

Creating Netlify Cloud Functions


I began dabbling with cloud functions with AWS Lambda. That was when I started developing. Around the same time, I learned the difference between a backend and a frontend - and the role of an API. It was a lot to take in, but the differences between serverless architecture and lift-and-shift cloud were clear.
Since then, I've worked with AWS Lambda Functions, Azure Functions, Firebase (Google Cloud) Functions, and Netlify Functions for various work tasks and side projects.
I've discovered the utility of these functions by using them where they are needed. For example:
- Lambdas are easy to edit data between a Firehose and S3
- Firebase functions can be triggered off of changes from RTD or Firestore databases
- Netlify functions are a simple and elegant way to run backend API calls without having to spin up a backend
I need to be honest, I love using Netlify to deploy my frontend apps. It's amazing to have functions bundled in with my frontend repo, deployed on the same TLD so that there are no CORS issues to deal with.
Case Study
To get up and running quickly, we will be hitting the Github API. This is partly due to the widespread familiarity with Github. Also, Github API allows calls to be made without authentication so that headache can be saved for another blog!
The basic flow will look like this:
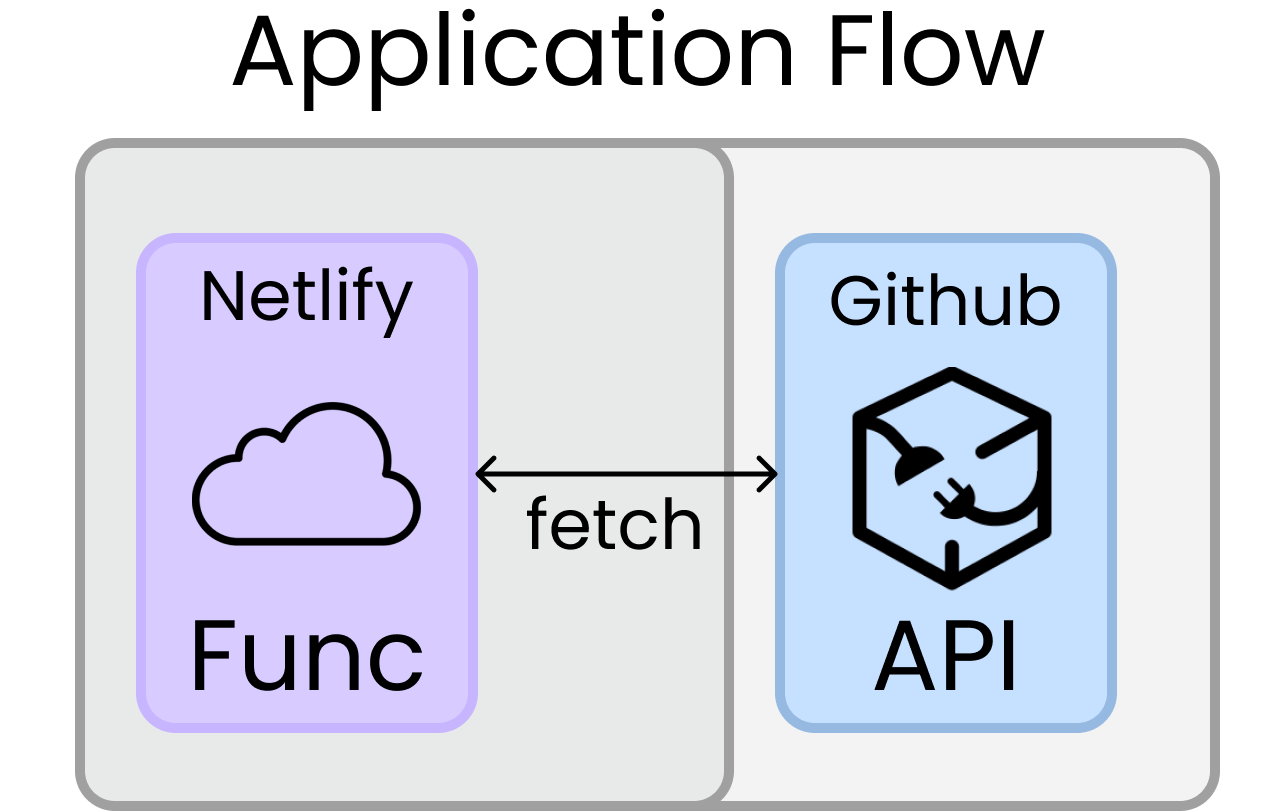
We will:
- Set up local repo
- Create Netlify function to call Github API
- Deploy function to Netlify
Prerequisites
To follow along, you will want the following:
- Netlify for deploying our site and using functions
- Github to integrate our site with netlify
- A text editor like VS Code
- Node installed (go with the LTS version)
- Netlify CLI installed
Create Repository
We are going to create a clean repository, hooked up to Github. We can do this in several ways. Instructions are given on Github when you create a fresh repository:
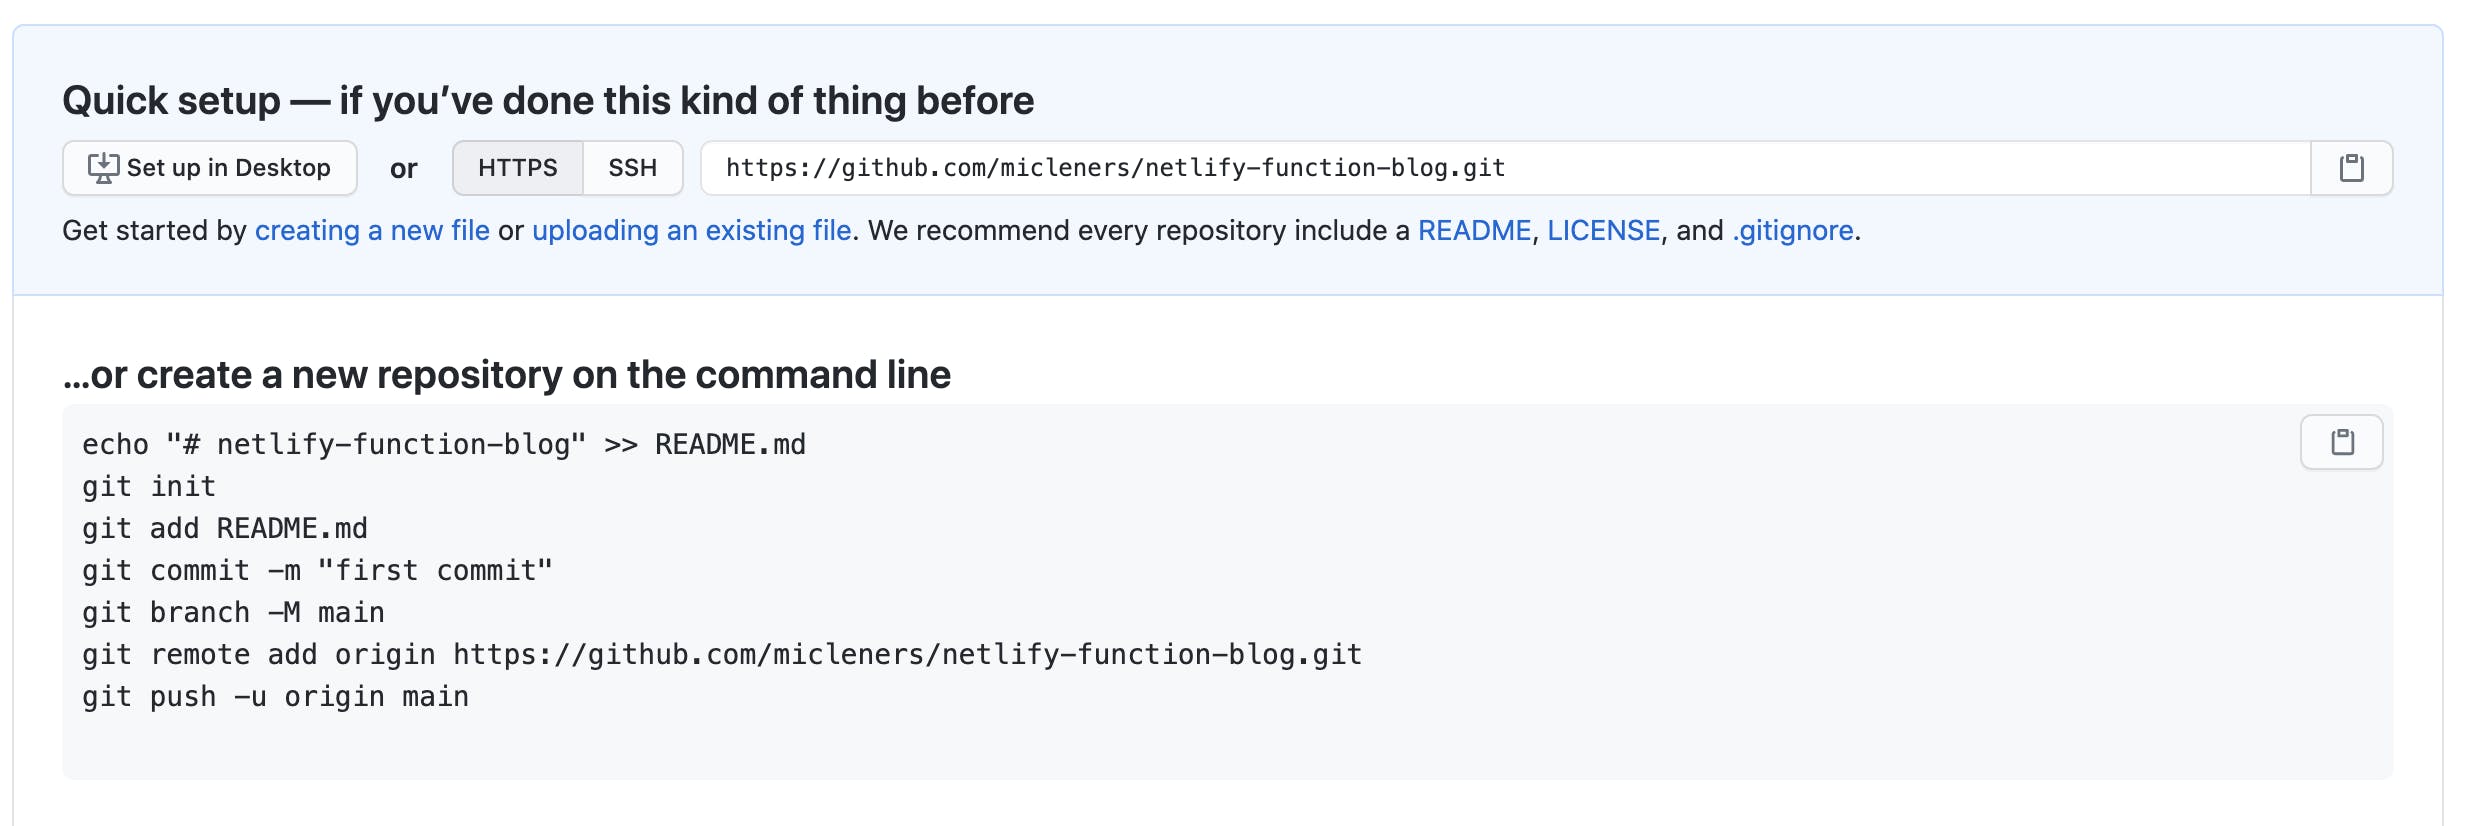
The second option of create a new repository on the command line is my typical go-to. That is because I usually forget to create my repo before I start my project locally 😅
Once you have your repo set up, cd into the project. For example, my repo is: netlify-function-blog so I will go:
cd netlify-function-blog
Initiation Netlify
To initiate this as netlify project, we will run:
netlify init
If you get an error here, make sure you have the Netlify CLI installed.
If you have the CLI and have not logged in before, you will get a request to log in.
After you are logged in, you should get a message like:
? What would you like to do?
  ⇄  Connect this directory to an existing Netlify site
❯ +  Create & configure a new site
Since we have not created our netlify site yet (you can do so from their GUI at netlify.com), chose the second option.
You can choose all of the default options while setting things up. What's important is the site name and the location for functions. I like the default of functions folder. The name makes sense, right?
Commit and push. You can check out your site by running
netlify open
Nothing really there. This is because we're going to focus on creating cloud functions.
Creating functions
We told netlify to look in the folder functions folder, so let's create this folder with mkdir functions and create a new file in it called helloWorld.js.
Let's create a new function here:
exports.handler = async function(event, context) {
    return {
        statusCode: 200,
        body: JSON.stringify({message: "Hello World"})
    };
}
This is a simple function that returns a "Hello World" message. We can locally test our function by running the command:
netlify dev
The server should automatically open up at localhost:8888. You can access your function by navigating to the subroute .netlify/functions/helloWorld.
You should get the response:
{
"message": "Hello World"
}
You can also commit and push your changes and check out the same subroute on your netlify app. For example, with my app, the url is https://netlify-function-blog.netlify.app/.netlify/functions/helloWorld.
Nice! 🎉
Now let's do something a bit more interesting. Let's use a function to make a call to Github to get our repositories and return them.
To make our API calls, we'll want fetch installed. Install this with npm like this:
npm install node-fetch
Then, create a new file in the functions folder called getRepos.js.Your code should look something like this:
const fetch = require('node-fetch');

exports.handler = async function (event, context) {
  const url = 'https://api.github.com/users/micleners/repos';
  const response = await fetch(url);
  const json = await response.json();

  return {
    statusCode: 200,
    body: JSON.stringify(json),
  };
};
Of course, you should fill in your username for micleners in the code above! And when you run it locally, you should get a list of repos you own!
To get this to run on Netlify, you'll need to do two things.
- Create a
package.jsonby running this command:
npm init
- Go into
netlify.tomland change the build command tonpm install. Yournetlify.tomlshould start like this:
[build]
  command = "npm install"
  functions = "functions"
With these changes, you should be able to merge and push your changes. Then you can hit your deployed function on Netlify.
Next Steps
This is just a tickle of what Netlify functions can do. You can imagine filtering and processing results in a function. You can also use Netlify environment variables to store and access secrets within functions. Check out Netlify docs on environment variables for more info!